

Parts & Assembly
Before we play the clarinet, it is important to understand proper assembly of the instrument to keep the clarinet in good working condition. There are a few keys on the clarinet that we must be mindful of as we assembly the instrument. Follow the instructions below to ensure you assemble your clarinet properly and keep it in good playing condition. Let's get started!
About this page


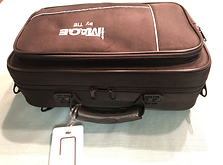
Opening the Case
Step 1- place the case on a flat surface with the handle facing you.
Step 2- carefully pull the latches up or unzip the case.
Step 3- slowly open the lid. The clarinet parts should rest easily on the bottom of the case inside pockets precisely shaped to fit each piece.
Step 4- check to make sure all the necessary pieces are in the case. Do not be alarmed if there are more pieces in your case than there are listed in the diagram; many clarinets have multiple barrels and/or mouthpieces to choose from.

Inside the Case
**Watch the assembly video before taking any of the clarinet parts out of the case**
See below this picture for the assembly video.

Mouthpiece Cover
Barrel
Lower Joint
Ligature
Upper Joint
Bell
Mouthpiece
Reed Cover & Reed
Assembly Video
Clarinet Assembly
Watch all of the assembly video before assembling your clarinet yourself to ensure you have put it together properly and it stays in working condition. Click the picture to the left and watch the video... clarinet assembly!
Protect the Reed
Remember to be careful with your reed; place it in your mouth while you assemble the clarinet to keep it protected and get it wet.

Place the top half of the reed gently on the top of your tongue.
Leave the bottom half out of your mouth, pointed toward the floor.
Protect the Bridge Key

Identify the bridge key by wiggling the correct key on the upper joint. Keep the bridge key pressed (second finger hole on the upper joint)while you gently twist the upper and lower joints together. Be careful
of the side keys
and twist as
little as possible
to prevent the
side keys from
getting damaged.
Second finger hole
Reed & Ligature Assembly

Reed Parts
Table
(flat side)
Tip
Rail/Edge
Heart
Shoulder
Bark/Stock
Heel

Step 1
Step 1: Begin with the clarinet assembled and the ligature removed from the mouthpiece. Read through all reed & ligature instructions before beginning assembly. Have your assembled clarinet, reed, and ligature within reach once you are ready to begin.
Step 2A: Pick up the reed from the heel; take care to avoid touching the tip or heart of the reed.
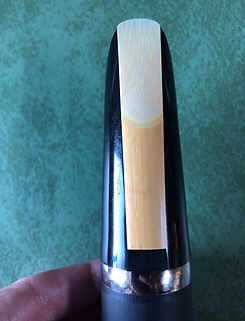
1. Lay the reed on top of the mouthpiece hole with the table down.
2. Line up the rails to be centered on the flat surface of the mouthpiece.
3. Align the tip of the reed with the tip of the mouthpiece.
Step 2B: Place your thumb on the heel of the reed to help keep it in place.
Step 2A

Step 2B

Step 3
Step 3: Gently slide the ligature over the top of the mouthpiece. Slide the ligature so that it sits below the shoulder of the reed. If needed, loosen the ligature screws so that it is able to slide down low enough. The ligature screws should face you and be centered with the gap in the middle of the ligature screws. Once the ligature is properly aligned, tightened the screws to be snug.
Next up...Let's make some noise!!On the next page, you will find details on how to form your mouth (embouchure) to create a sound properly on the clarinet and how to sit properly. Click on the 'Noise & Posture' link to get started.
Music can be used for many different types of emotions… this video is on the silly side.
These four musicians are playing a fun and familiar song, but there is a very high level of musicianship being displayed. Wow, these guys are talented!
This could be you! While you may not sound as good as Myles right away, with a bit of practice and dedication you could be playing along with your favorite songs in a short time. It's fun and a great way to learn!